

Procedure for Calibrating Crankshaft and Camshaft Position Sensors
Crankshaft and camshaft position sensors play a crucial role in engine operation. These sensors determine the exact positions of the crankshaft and camshaft, providing vital information to the Engine Control Unit (ECU). This data is used to synchronize ignition, fuel injection, and other engine parameters to ensure optimal performance. However, after repairs or parts replacements, proper calibration of these sensors is essential to guarantee engine reliability and performance.
Table of Contents
Understanding the Function of Crankshaft and Camshaft Position Sensors
Crankshaft Position Sensor: Monitors the position and speed of the crankshaft. This information is used to adjust fuel injection and ignition timing. The sensor is typically located near the crankshaft pulley.
Camshaft Position Sensor: Monitors the position of the camshaft, allowing the ECU to precisely synchronize fuel injection and ignition timing based on engine cycles. This sensor is crucial, especially for variable valve timing engines.

These sensors enable the ECU to optimize engine efficiency by adjusting combustion timing.
Signs of Sensor Malfunction
Crankshaft and camshaft position sensors can fail due to various reasons: wear, damage, wiring issues, or contamination. Common symptoms include:
Check Engine Light: Often indicates a problem with the position sensors.
Hard Starting: Difficulty starting the engine or frequent stalling may signal sensor failure.
Irregular Engine Idle: Erratic engine operation, misfires, or rough idling can result from miscalibrated sensors.
Loss of Power and Performance: Sensor malfunction can lead to poor fuel injection and ignition timing, affecting engine performance.
Calibration Procedure
Proper calibration of these sensors is essential after replacement or engine system repairs. The general steps include:
Verify Component Connectivity and Integrity: Ensure sensors are correctly installed and all electrical connections are secure.
Use a Compatible Diagnostic Tool: A specialized diagnostic tool is necessary to access the ECU and perform calibration. This tool connects via the OBD-II port and allows for sensor data reading and adjustment.
Perform Calibration Tests: The diagnostic tool will guide you through calibration steps, which may include resetting sensor data, adjusting sensor positions, and testing engine operation to confirm proper synchronization.
Verification and Validation: After calibration, conduct a road test to ensure the engine operates smoothly and the initial issues are resolved.
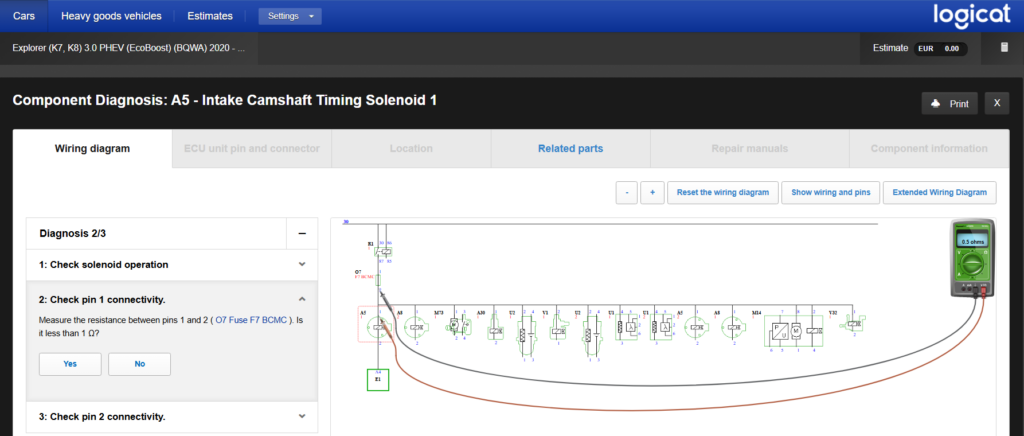
Case Study: Successful Calibration with HaynesPro
An automotive repair shop encountered issues with crankshaft and camshaft position sensors after component replacement. Using HaynesPro, the technician accessed detailed calibration procedures tailored to the vehicle model. The integrated diagnostic tool facilitated sensor adjustments and synchronization with the ECU. Post-calibration tests confirmed the engine’s optimal performance, demonstrating the effectiveness of HaynesPro in sensor calibration.
By following the step-by-step calibration process provided by HaynesPro, the mechanic quickly restored proper sensor functionality. A road test confirmed that the car restarted easily, ran smoothly, and that the engine was operating correctly.
With the help of HaynesPro’s comprehensive documentation and diagnostic tool, the workshop resolved the issue efficiently and ensured customer satisfaction.
Calibrating crankshaft and camshaft position sensors is vital for maintaining engine performance after repairs or parts replacements. By following a precise procedure and utilizing appropriate diagnostic tools like HaynesPro, technicians can ensure accurate sensor calibration, leading to enhanced engine reliability and efficiency.
Ready to improve your sensor diagnostics and repairs?
Don’t waste any more time, try HaynesPro free for 7 days and discover all its benefits.